Integration guide for MirtaPBX
Before proceeding with this guide, please ensure that you have first followed the instructions for instructions for the Asterisk / MirtaPBX setup. Once you have completed those steps, you may proceed with this guide.
You need to configure for each extension the following settings:
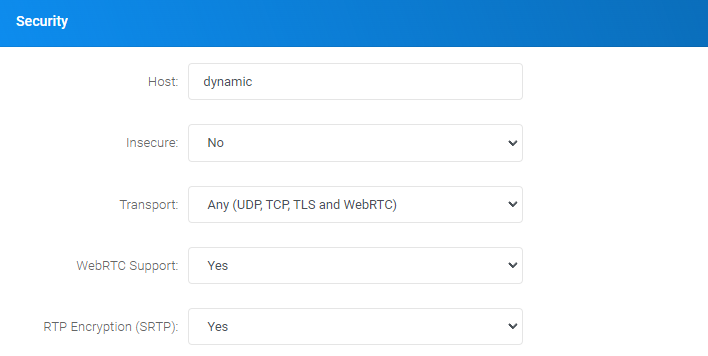
Security section:
-WebRTC Support: Yes
-RTP Encryption (SRTP): Yes
Once these changes have been made, users can log in to the WebRTC client.
MirtaPBX – Qridd API Integration
Additionally, Qridd can communicate with the MirtaPBX API, saving time and eliminating the need to share or save SIP credentials with Qridd***. The GETWEBRTCAUTH API request collects the SIP username and password when a user logs in, allowing Qridd to establish a websocket connection to the PBX with these credentials.
***Please note that the “forgot password” feature will not work as the password is statically set in MirtaPBX.
To set up the MirtaPBX API:
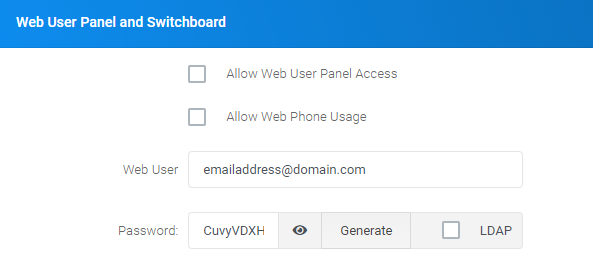
- Create an extension, enable WebRTC support and SRTP
- Enter a Web User(as an email address) and password, which will serve as the user’s credentials
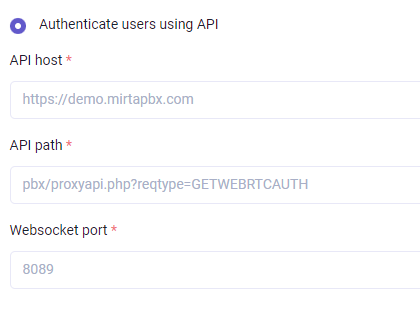
In the Qridd management portal:
- Navigate to the PBX server settings and select “Authenticate users using the API”
- Enter the necessary information (as shown in the example below):
The newly created user can now log in to Qridd.